The Art and Science of Interior Painting
Interior painting is more than just a decorative endeavor. It’s a true blend of art and science, combining aesthetic selection with technical application. From choosing the perfect color to understanding the best techniques, it takes a well-rounded knowledge to achieve a professional finish.
What is Interior Painting?
Interior painting is the process of applying paint to the interior surfaces of a home, typically walls and ceilings. This practice serves both a protective and decorative purpose, shielding the surfaces from wear and tear while enhancing the overall aesthetics of the space.
Types of interior painting can range from basic single-color wall painting to more complex techniques like faux finishing, stenciling, and murals. The choice of paint color, finish, and design can dramatically alter the mood and style of a room. For an array of creative and inspiring ideas, visit our page on interior painting ideas.
Importance of Good Interior Painting
Understanding the significance of good interior painting is crucial. Well-executed painting can transform a house into a home, reflecting the personality and taste of the inhabitants. It can create a welcoming environment, evoke emotions, and even influence the perceived size and brightness of a room.
Moreover, good interior painting can add value to a home. A fresh, professional-grade paint job can enhance a property’s appeal to potential buyers or renters. On the flip side, poor painting can detract from a home’s appearance, making it seem neglected or outdated.
Quality interior painting also plays a protective role. A good paint job can shield walls from moisture, dust, and daily wear, prolonging the life of the home’s interior. For more insight into the protective qualities of different paints, explore our article on interior paint types.
In essence, interior painting is a smart investment for homeowners. Whether you’re looking to freshen up your living space or prepare your property for sale, mastering the art and science of interior painting can yield notable benefits. Stay tuned for practical interior painting tips that will help you achieve a professional finish.
Pre-Painting Tips
Before you dive into the task of painting your home’s interior, it’s essential to have a clear plan. This includes choosing the right colors, selecting the right type of paint, and properly preparing your walls. These initial steps play a significant role in achieving professional-looking results.
Choosing the Right Colors
Choosing the right colors for your home can have a profound impact on the ambiance of your space. The colors you select should complement the existing furniture, fixtures, and overall theme of your home.
When choosing colors, consider the following factors:
- Room size: Light colors can make a small room appear larger, while dark colors can create an intimate, cozy atmosphere in larger rooms.
- Lighting: Consider the amount of natural and artificial light the room receives. Some colors may appear different under different lighting conditions.
- Mood: Different colors can evoke different moods. For example, blues and greens often create a calming effect, while reds and yellows can energize a space.
For more ideas on choosing the right colors for your home, visit our article on interior paint color schemes.
Selecting the Right Type of Paint
The type of paint you select can greatly affect the finish and durability of your paint job. Paint comes in various types, including latex (water-based) and oil-based paints.
Latex paint is popular due to its easy clean-up and long-lasting durability. It’s an excellent choice for most indoor walls. Oil-based paint, on the other hand, is great for high-moisture areas and when painting over surfaces previously painted with oil-based paint.
Paints also come in a variety of finishes, including flat/matte, eggshell, satin, semi-gloss, and high gloss. Each offers a different level of sheen and durability. For more information on different types of paint and finishes, check out our articles on best paint for interior walls and interior paint finishes.
Preparing Your Walls
Proper wall preparation is key to achieving a smooth, flawless finish. This process typically involves cleaning, repairing, and priming your walls.
- Cleaning: Clean your walls to remove dust, dirt, and grease that could prevent the paint from adhering properly.
- Repairing: Inspect your walls for holes, cracks, or peeling paint. Use a putty knife and patching compound to fill any imperfections. Once the compound dries, sand the area smoothly.
- Priming: Applying a primer to your walls can help ensure a uniform appearance and increase the durability of your paint job. It’s especially important if you’re painting over a darker color, painting a porous surface, or if your walls have stains. For more information on primers, check out our article on interior paint primer.
By taking the time to carefully plan and prepare for your painting project, you’ll be well on your way to achieving a professional-looking paint job. These interior painting tips will ensure your home’s walls look fresh and new for years to come.
The Painting Process
A significant aspect of achieving professional-looking results with your interior paint job is understanding and implementing the correct painting process. This process majorly involves using the right painting tools, applying the correct painting techniques, and following key tips for a smooth finish.
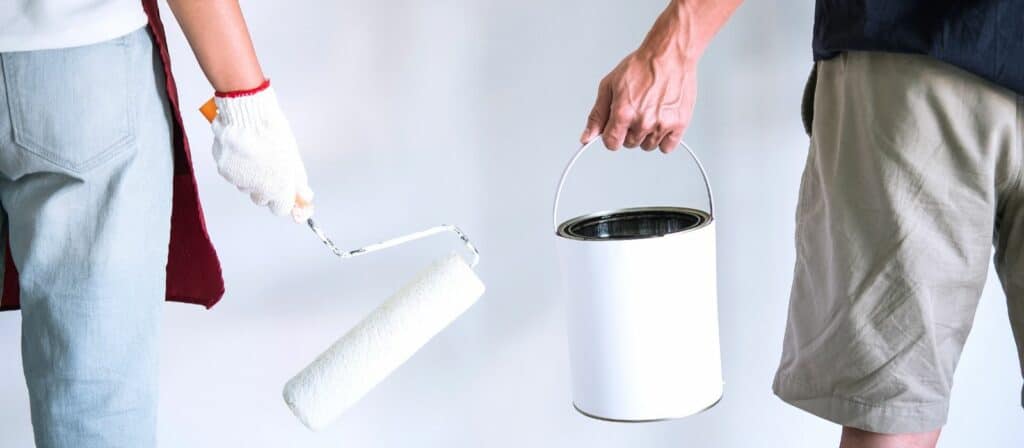
Essential Painting Tools
Before commencing the painting job, ensure you have all the essential painting tools at hand. The basic tools you require for interior painting include:
- Paint: Choose the right type of paint suitable for your walls. Our article on best paint for interior walls can guide you through this selection process.
- Paint Brushes and Rollers: Brushes are required for painting edges and corners, while rollers are used for larger, flat surfaces.
- Paint Tray: This is used to hold and distribute the paint evenly on the roller.
- Drop Cloths: These are essential for protecting your furniture and floor from paint splatters.
- Painter’s Tape: This is used to protect window and door frames, baseboards, and other areas you don’t want the paint to touch.
- Ladder: Depending on the height of your walls, a ladder may be necessary to reach higher areas.
The Correct Painting Techniques
Knowing the right painting techniques can make all the difference in the quality of your finish. Here are some essential techniques to follow:
- Use a Primer: A primer helps to create a smooth surface for painting and allows the paint to adhere better. It’s especially important if you’re painting over dark colors or new drywall. You can learn more about the benefits in our article on interior paint primer.
- Paint in “W” Pattern: When using a roller, start in a corner and paint a “W” on your wall. Then, without lifting the roller, fill in the empty spaces. This technique helps to distribute paint evenly.
- Don’t Overload the Brush: Dipping the brush too far into the paint can cause drips. Aim to dip the brush only one-third of the way in, and then tap it against the sides of the paint can to remove excess paint.
- Maintain a Wet Edge: Always try to keep a wet edge as you paint, meaning you should merge the new paint you’re applying with the edge of the area where the paint is still wet. This helps to avoid visible lines when the paint dries.
Tips for a Smooth Finish
To achieve a smooth, professional-looking finish, consider these tips:
- Prep the Walls: Before painting, clean your walls to remove any dust or grime. Fill in any holes or cracks with filler, and allow it to dry before sanding smooth.
- Use High-Quality Tools: High-quality brushes and rollers can provide a smoother finish and make the painting process easier.
- Take Your Time: Don’t rush the painting process. Take your time to do it right, allowing each coat of paint to fully dry before applying the next.
- Use the Right Paint Finish: Different finishes, such as matte, eggshell, satin, semi-gloss, and gloss, offer different levels of sheen and durability. The right one can enhance the look and feel of your room. Our article on interior paint finishes can help you choose the right one for your space.
Implementing these interior painting tips can significantly improve your painting process and the quality of your results. Remember, patience and preparation are key to a successful interior painting job.
Post-Painting Care and Maintenance
When you have successfully completed your interior painting project, the work is not entirely done. Ensuring post-painting care and maintenance is crucial for the longevity of your paint job and the preservation of your tools. In this section, we’ll discuss cleaning and storing your brushes and maintaining your newly painted walls.
Cleaning and Storing Your Brushes
Proper cleaning and storage of your painting tools, especially brushes, can significantly extend their lifespan and maintain their effectiveness for future painting projects.
To clean your brushes, rinse them thoroughly in a container of warm water until the water runs clear. If you’ve used oil-based paints, you may need to use a paint thinner to remove the paint. Once cleaned, use a brush comb to remove any leftover paint and to realign the bristles.
When storing your brushes, avoid standing them upright on their bristles as this can cause them to bend and lose their shape. Instead, lay them flat or hang them up, and protect the bristles with the original cardboard sleeve or a piece of heavy paper wrapped and secured with a rubber band.
Maintaining Your Newly Painted Walls
Maintaining your freshly painted walls is key to keeping them looking their best for years to come. Here are some essential interior painting tips:
- Avoid touching the walls for at least 24 hours after painting to allow the paint to dry completely.
- Clean your walls regularly to prevent dust and dirt build-up. Use a soft, damp cloth or sponge to gently wipe the walls. For tougher stains, use a mild soap solution.
- Protect your walls from furniture and other objects that might scratch or chip the paint. Use felt pads on furniture legs and avoid hanging heavy items on the walls.
- Touch up any damage as soon as possible. Keep a small amount of the original paint for this purpose.
| Maintenance Actions | Frequency |
|---|---|
| Light cleaning (dusting) | Once a month |
| Deep cleaning (wiping with a damp cloth) | Two to three times a year |
| Checking for chips and scratches | Once a month |
| Touch-ups | As needed |
By following these maintenance steps, you’ll ensure your walls continue to look fresh and vibrant. For more information on maintaining your painted walls, check out our guide on house interior painting.
In conclusion, the post-painting process is just as essential as the preparation and actual painting. Proper care and maintenance will not only extend the life of your painting tools but also keep your walls looking their best. With the right care, your interior paint job can last for many years.
Common Mistakes in Interior Painting
In the realm of interior painting, a few common mistakes can significantly impact the final outcome of your project. By being aware of these pitfalls, homeowners can ensure a smoother painting process and achieve professional-looking results.
Painting Without Primer
Primer serves as the base coat for your paint, improving its adhesion to the wall and enhancing the paint’s durability and color. Skipping this crucial step often leads to uneven color distribution, increased paint absorption, and the need for additional coats of paint.
Applying a primer is particularly important when painting over dark colors or porous surfaces, as it helps to cover the old color and reduce the number of paint coats needed. For more information on the importance of primer in interior painting, refer to our guide on interior paint primer.
Ignoring the Importance of Even Coats
The application of even coats is another critical aspect of interior painting that is often overlooked. Uneven coats can lead to streaks and patches on the painted surface, resulting in an unprofessional finish.
To achieve even coats, one should pay attention to the amount of paint on the brush or roller and the pressure applied during painting. Furthermore, using a roller instead of a brush can help achieve a more even distribution of paint. For more advanced painting techniques, check out our house interior painting guide.
Neglecting Proper Ventilation
Proper ventilation is a safety concern that should never be neglected during the painting process. Paint fumes can pose health risks, and good ventilation helps to disperse these fumes, reducing their concentration in the air.
Before beginning the painting process, ensure that all windows are open and that fans are running to improve air circulation. If the room has no windows, a respirator mask should be worn to minimize inhalation of paint fumes.
In addition, proper ventilation can also aid in the drying process by reducing the amount of time it takes for the paint to dry. For more tips on ensuring a safe and efficient painting process, refer to our comprehensive guide on interior painting tips.
Avoiding these common mistakes can greatly improve the results of your interior painting project. By investing time in proper preparation and execution, homeowners can achieve a professional-looking paint job that enhances the beauty of their homes.
Advanced Tips for Professional-Looking Results
To achieve professional-looking results with your interior painting project, there are a few advanced techniques that you can use. These interior painting tips can help you create clean lines, custom colors, and unique textures and patterns on your walls.
Using Tape for Clean Lines
One of the most effective ways to ensure clean, sharp lines when painting is to use painter’s tape. This special tape can be applied to the edges of the area you’re painting, creating a barrier that prevents paint from seeping onto adjacent surfaces.
When using painter’s tape, make sure to press it down firmly to create a tight seal. After the paint has been applied and has had time to dry, carefully remove the tape by pulling it back on itself at a 45-degree angle.
This process can help you achieve a professional finish, whether you’re painting trim, creating color-blocked walls, or adding intricate designs. For more painting tips and ideas, check out our article on interior painting ideas.
Mixing Paints for Custom Colors
If you’re looking for a specific color that isn’t available off the shelf, consider mixing your own custom colors. This can be a great way to create a unique look that’s tailored to your personal style.
To mix paints, simply pour the colors you want to combine into a clean, empty paint can and stir thoroughly until the colors are completely blended. It’s important to mix enough paint to complete your project, as it can be difficult to replicate the exact color later if you run out.
Remember to test your custom color on a small, inconspicuous area of the wall before painting the entire surface. This will allow you to see how the color looks in your room’s specific lighting conditions. For more information on choosing the right colors for your project, check out our article on interior paint color schemes.
Adding Textures and Patterns to Your Walls
Adding textures and patterns to your walls can give your space a unique, dynamic look. There are numerous techniques you can use, such as sponging, rag-rolling, or using a textured roller.
When adding textures or patterns, it’s important to practice your technique on a piece of scrap wallboard or cardboard before applying it to your walls. This will allow you to perfect your technique and ensure that you’re happy with the results.
Remember, when working with textures and patterns, it’s best to start with a base coat of paint and let it dry completely before adding your texture or pattern. This will provide a smoother surface for your design and help prevent the base color from bleeding through. For more tips on adding textures and patterns, check out our article on interior paint design.
By employing these advanced interior painting techniques, you can elevate your DIY painting project and achieve a professional-looking finish. Whether you’re repainting a single room or the entire interior of your house, these tips can help you create beautiful, long-lasting results.